Xano
If you are already using Xano, you certainly want to connect it to ncScale.
We will guide you to make sure that everything is configured and ready to go!
If you're using Xano Build (Free) plan, expect difficulties and issues due to Xano limitations on their API while using ncScale.
Additional information available on the Xano API Rate Limit documentation
Click here to see what you're able to do with Xano on ncScale:
- Use our Assets-catalog feature to monitor your API endpoint and database's table.
- Use our Log-management feature to centralise your Xano logs with the rest of you entire stack logs.
- Use our Alerting feature to be alerted whenever you decide to.
If you are using the branching system of Xano, the Assets-catalog feature will only show both No-Code components from your 'Live Branch' and components from non-Live Branches that have logs related to them in the 'Log retention' duration given by your application plan.
First, you'll need to go to your Xano.
You'll need to provide 1 information to ncScale:
- Your Xano APIKey
To get this information, go to your Xano application and connect yourself.
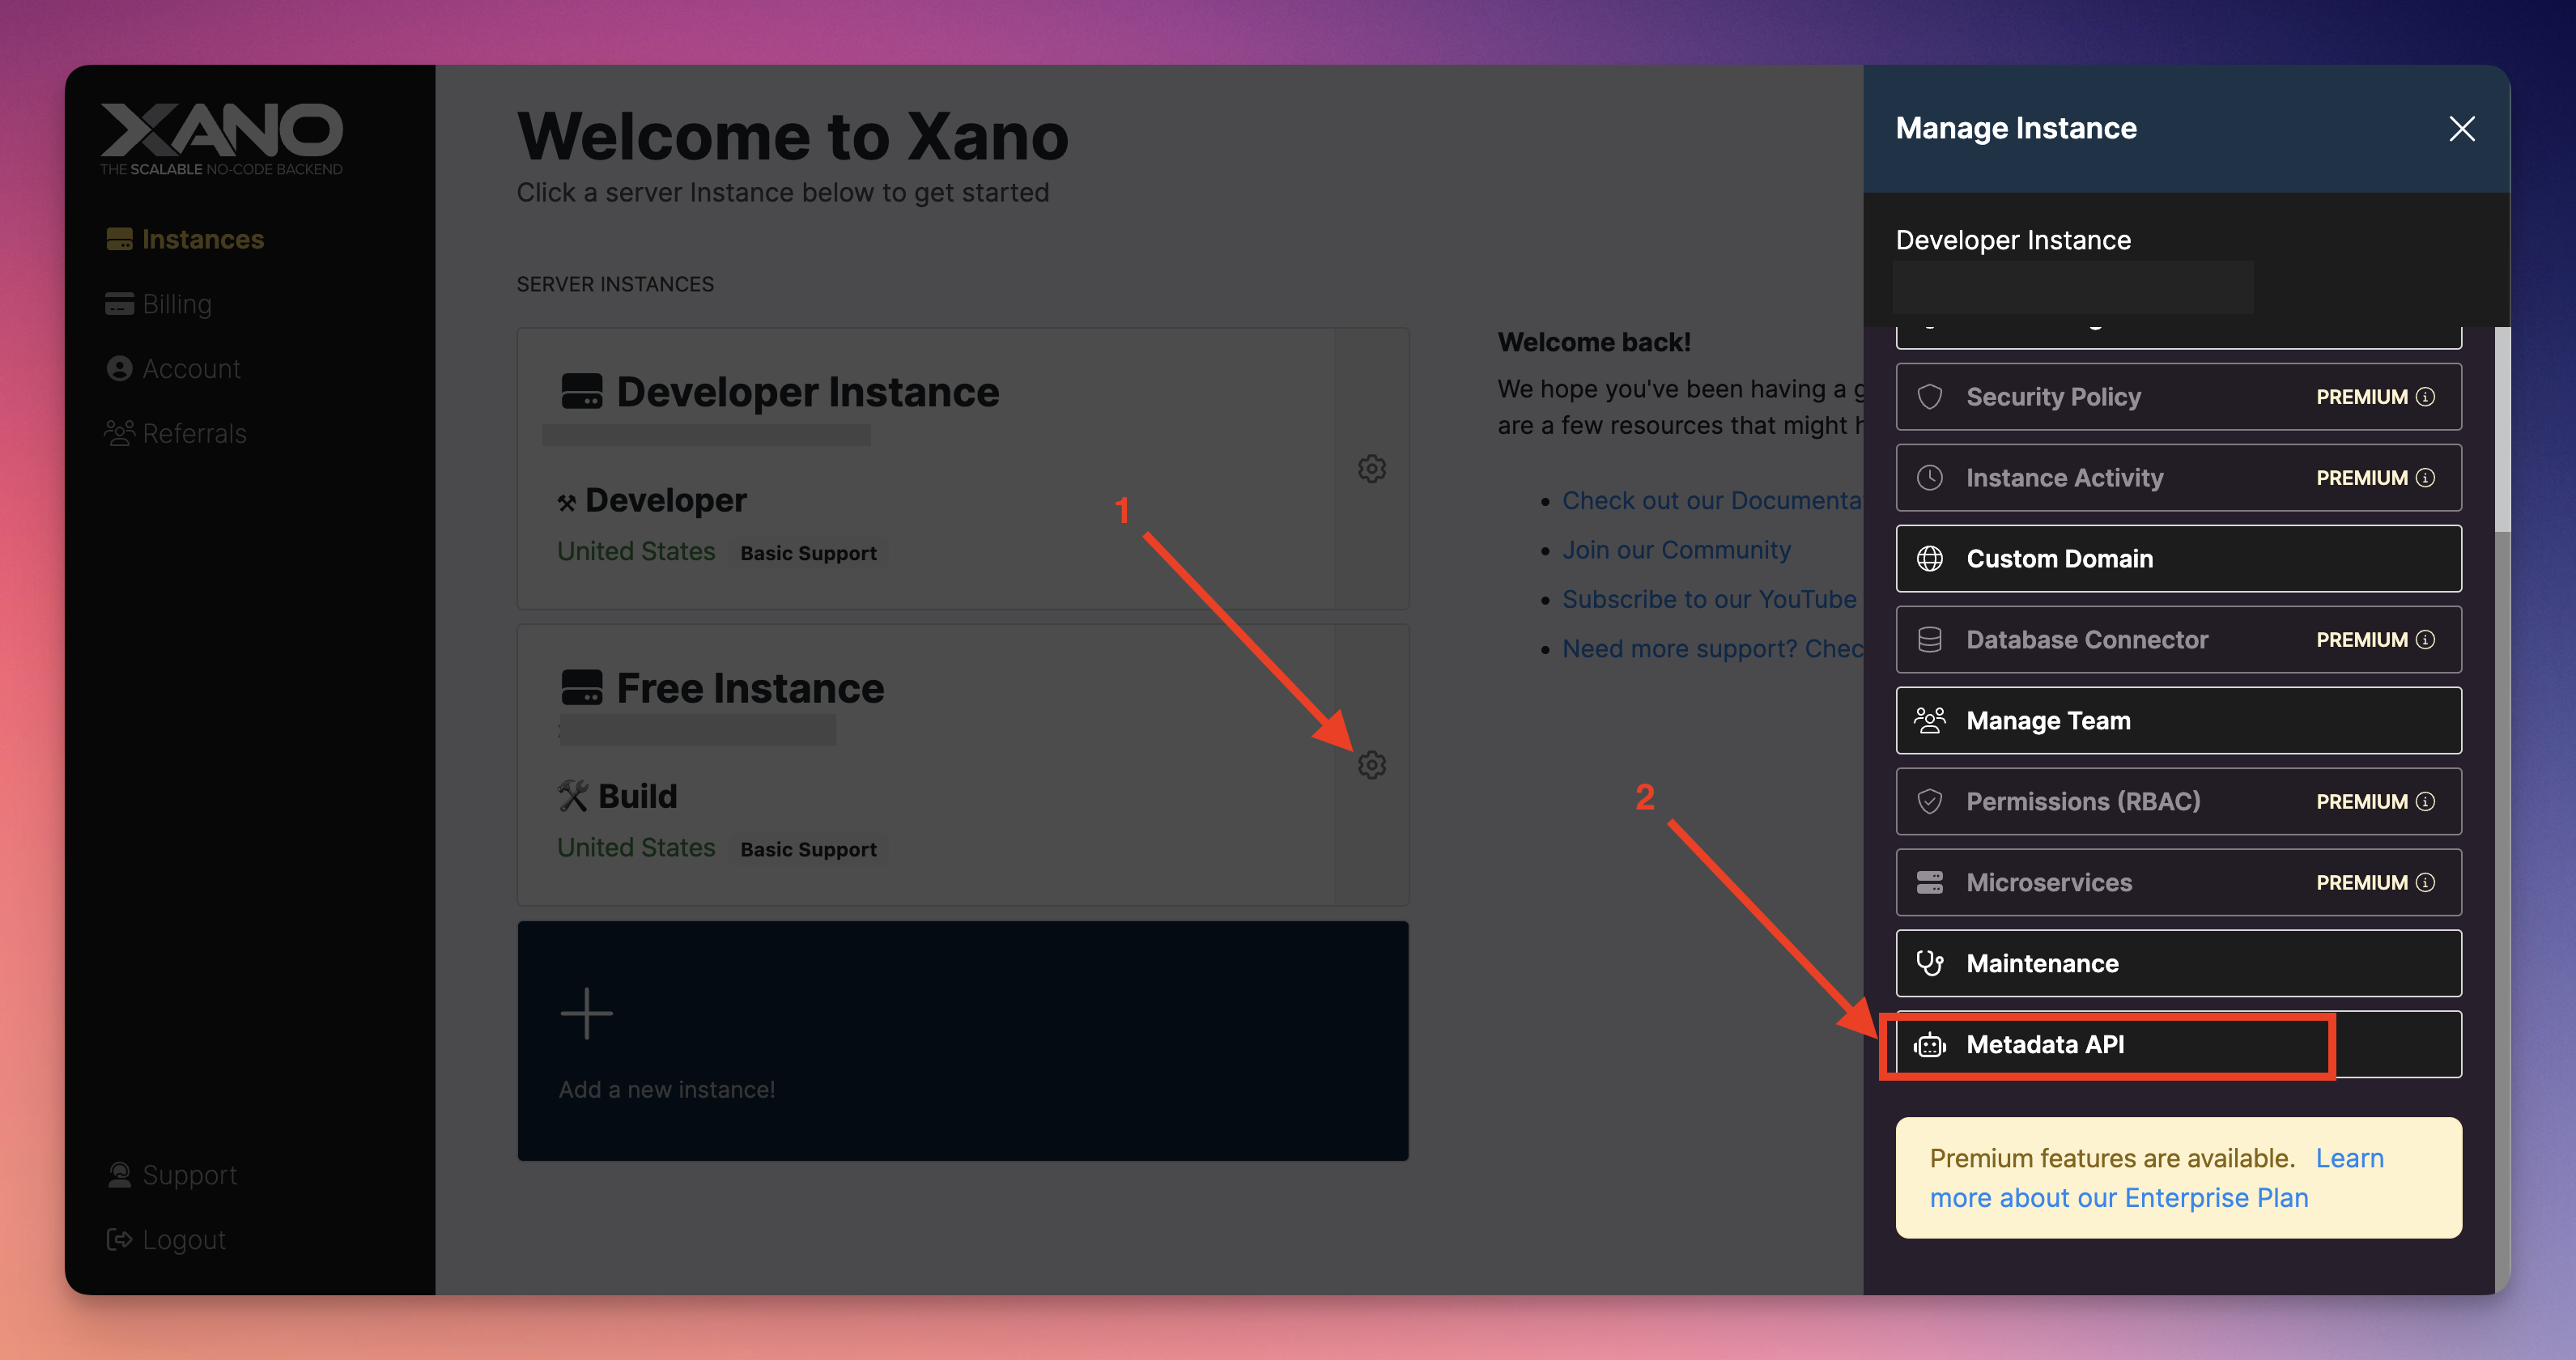
You'll need to click on any of your 'Instance settings' (1), and then on "Metadata API" (2).

Then, click on "Manage Access Tokens"
if you already have an API that have all "Read" permission, you can use it, otherwise, you'll need to create it.
Click on "New Access Token".
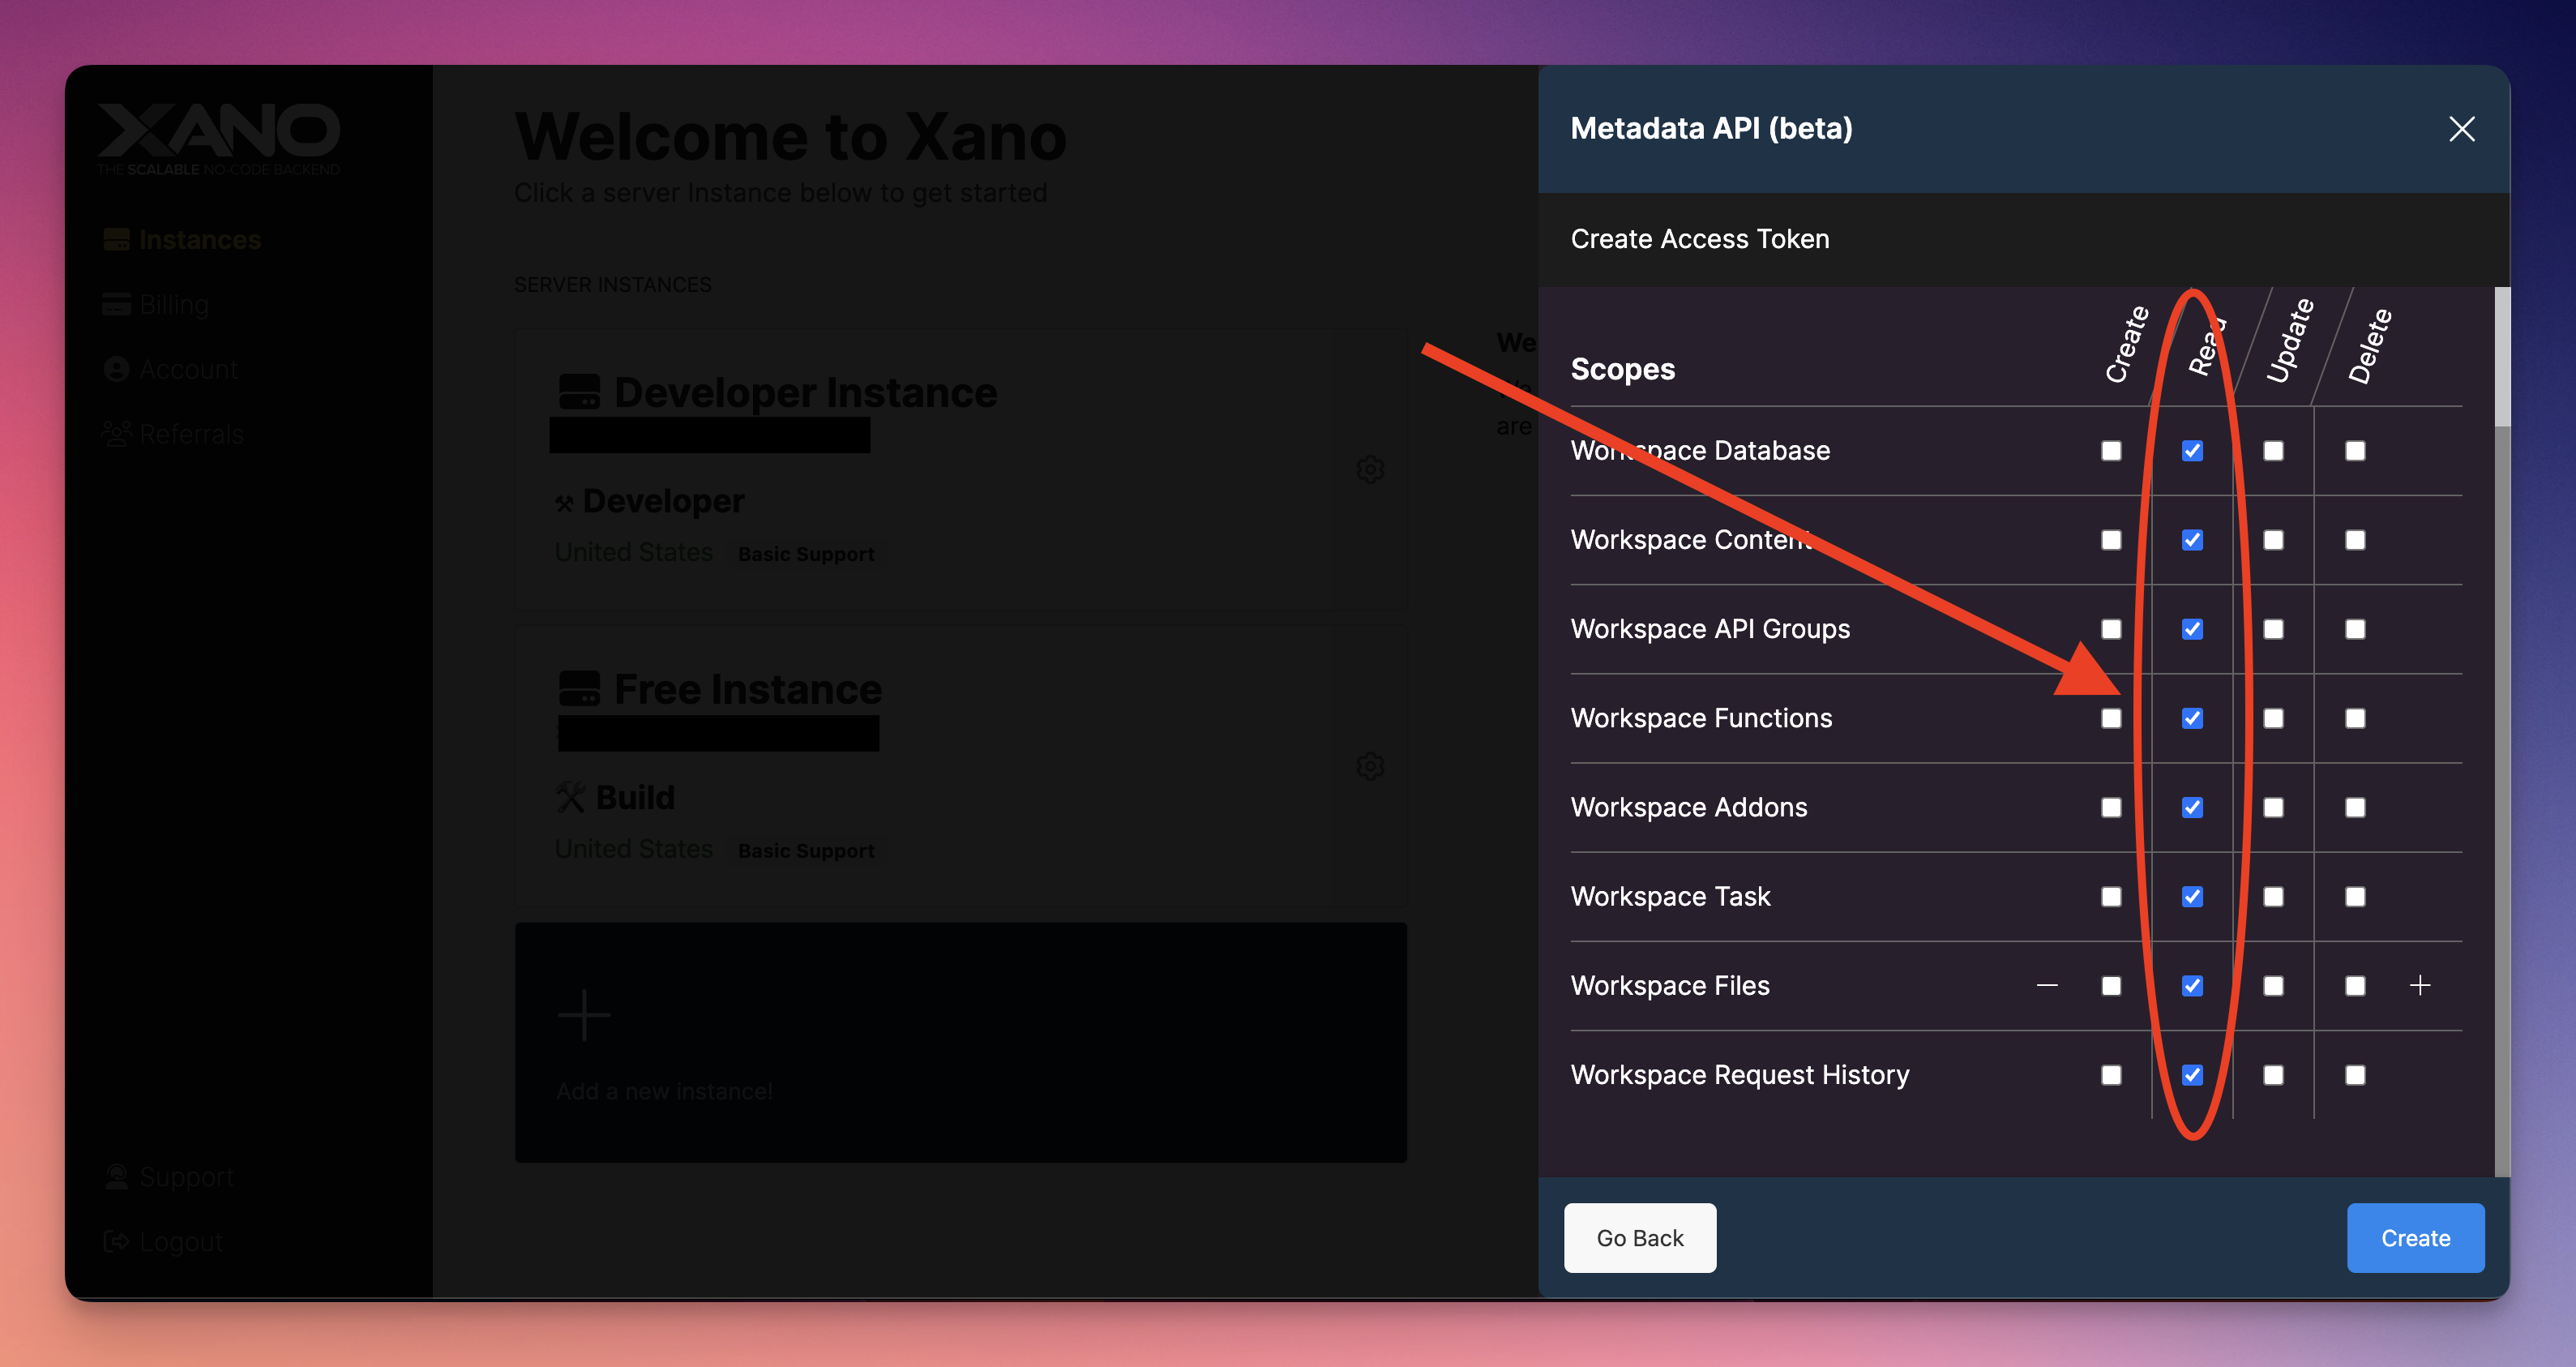
Give your APIKey a name, and make sure that all "Read" permission are granted, then click on the "Create" button.

And now your APIKey is created! The last thing you'll need to do on Xano is to copy it.

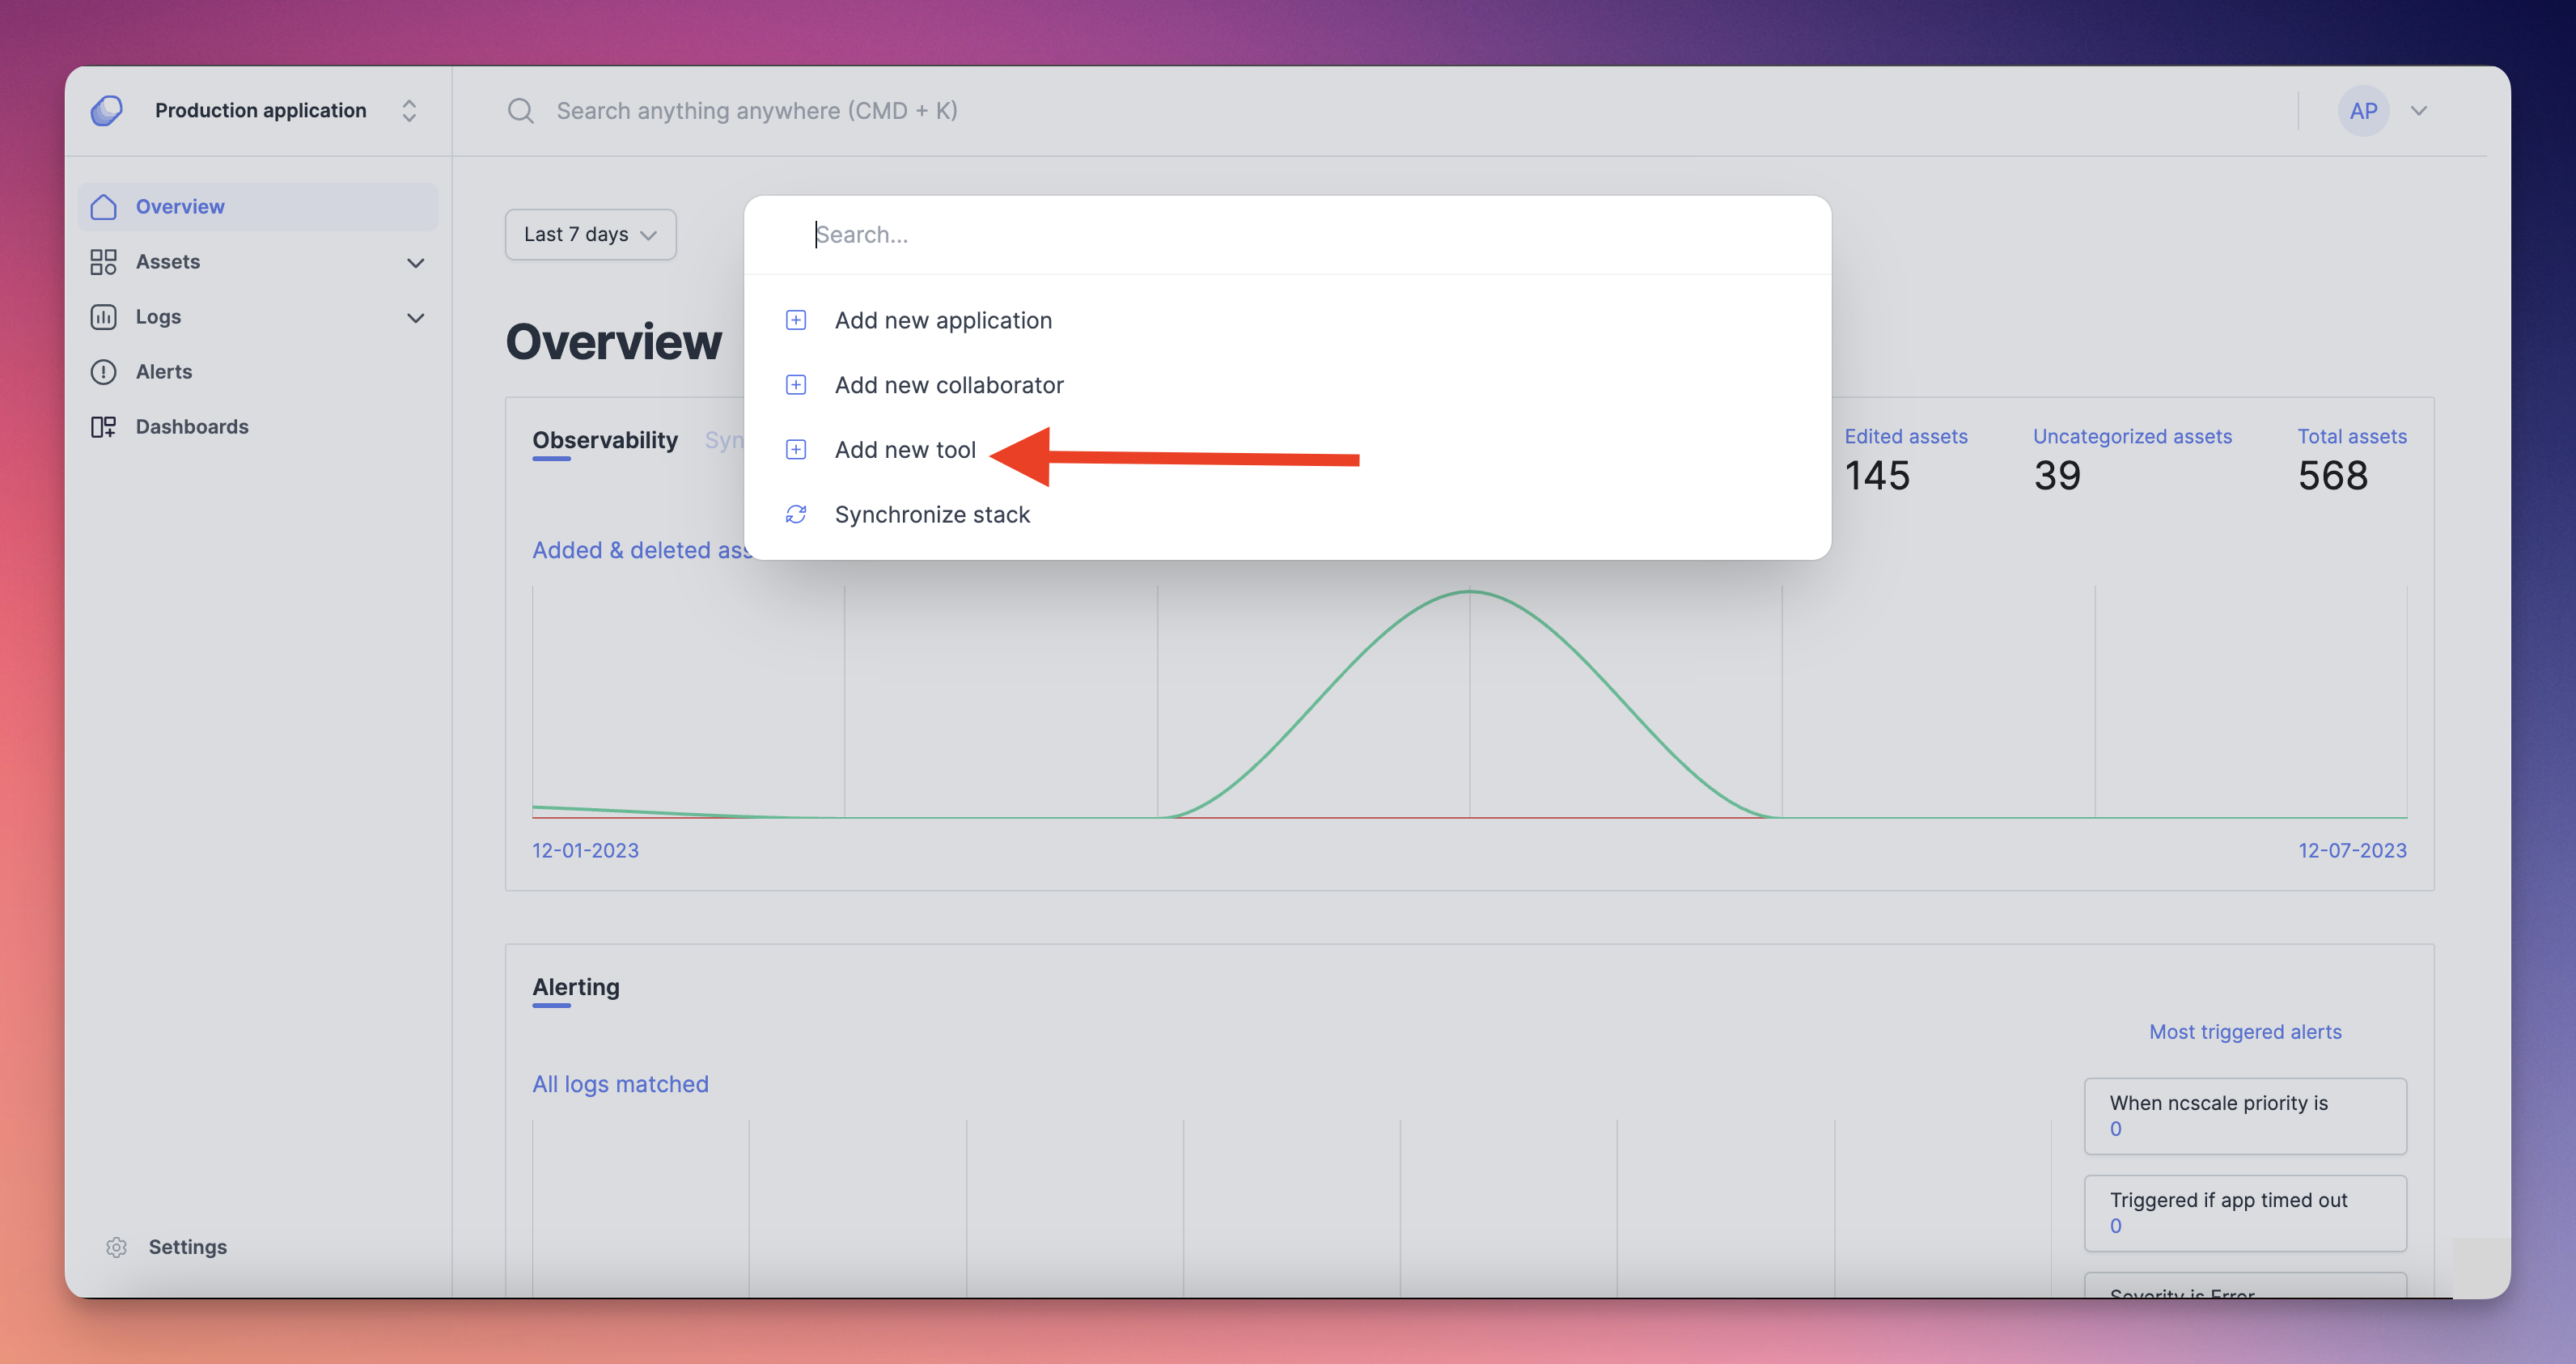
Then, on the ncScale side, you'll have to create your tool. To do that, press "CMD + K" ( or CTRL + K on Windows) and click on "Add new tool".

Then, select on the list "Xano". A little modale will appear on your screen. Fill the form with :
- Your Xano APIKey (1)
And then you can choose to activate or not the features available for Xano (2). You can click on the "Select instance" button (3) to then select which Xano instance you want to connect to ncScale (3).

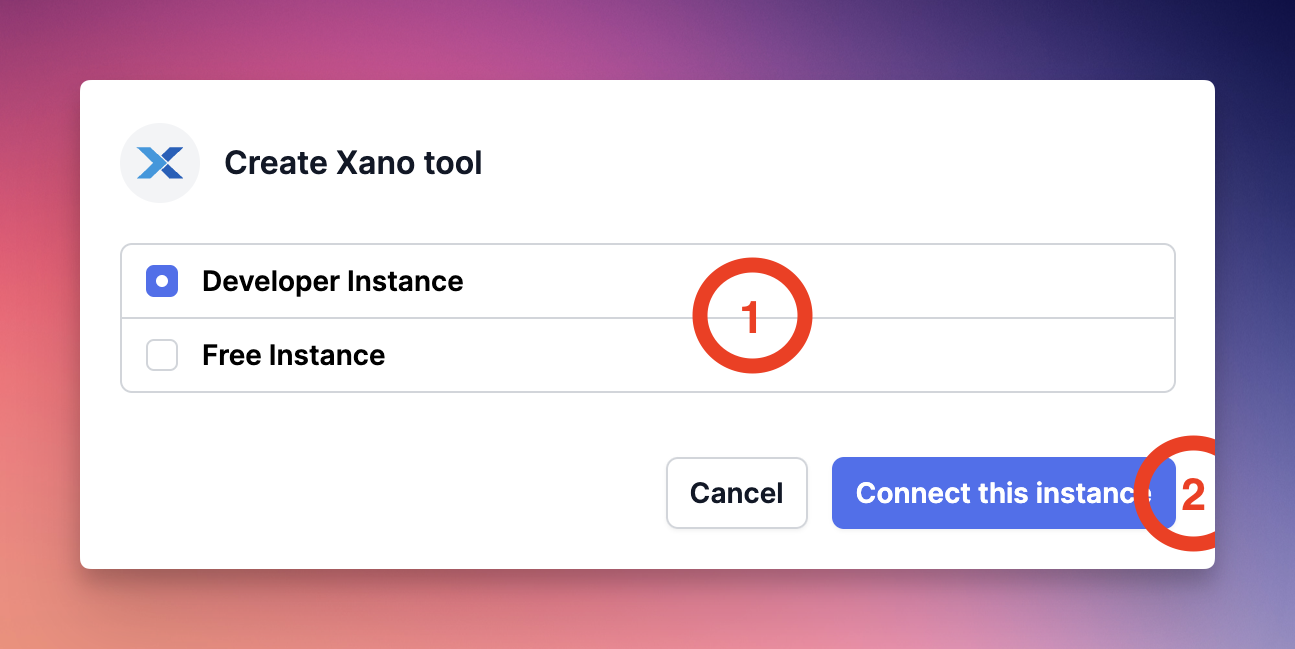
And finally, you can now select the instance you want to connect (1), and finally connect the specific instance you want by clicking on the "Connect this instance" button (2)

And now, your Xano tool is completely configured and ready to go!