Airtable
If you are already using an Airtable project, you certainly want to connect it to ncScale.
We will guide you to make sure that everything is configured and ready to go!
Click here to see what you're able to do with Airtable on ncScale:
- Use our Assets-catalog feature to monitor your database's table and automations.
First, you'll need to do a bit of work on the Airtable side.
You'll need to provide 2 information to ncScale:
- The ID of your Airtable project
- An APIKey that'll allow ncScale to read your project's table schema
To get the first information, you just have to load you project, and copy the ID in the URL
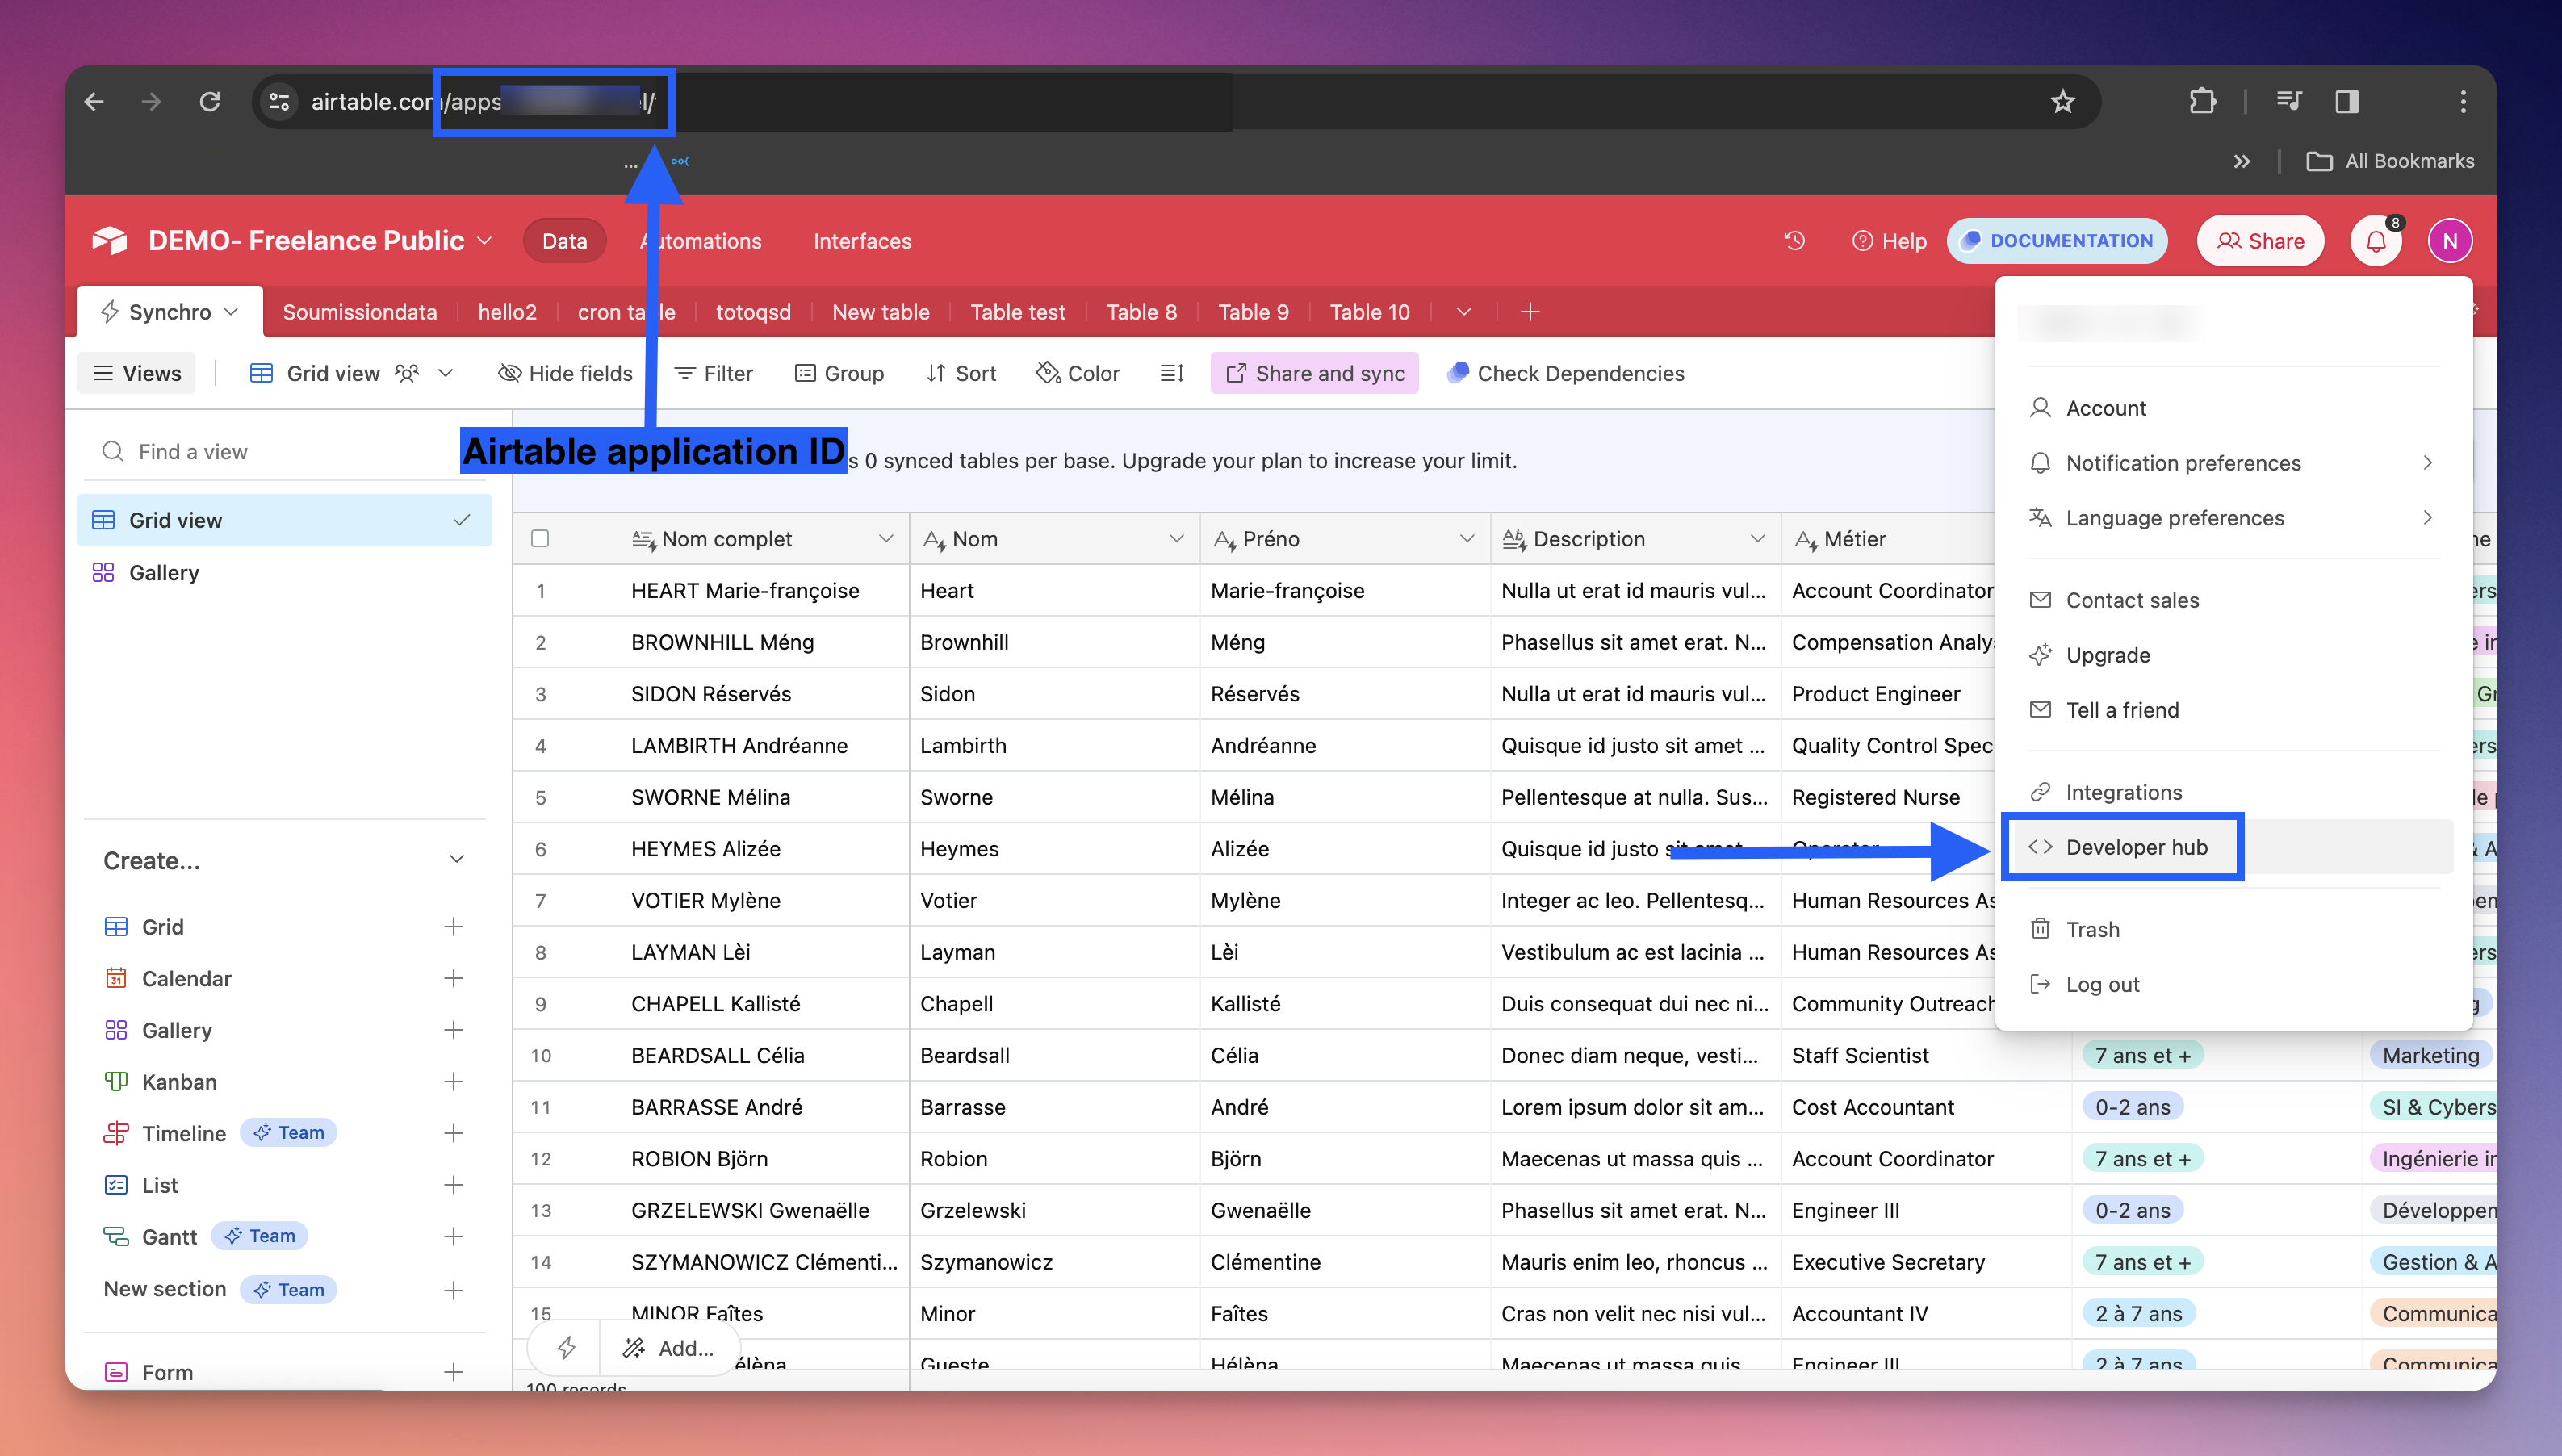
Then, you'll have to go to the Airtable Developer Hub.
If you haven't already, you'll need to create a "Personal access token" that has the schema.bases:read scope on the application you're connecting to ncScale
To do so, on the Airtable Developer Hub, click on the "Create new token" button

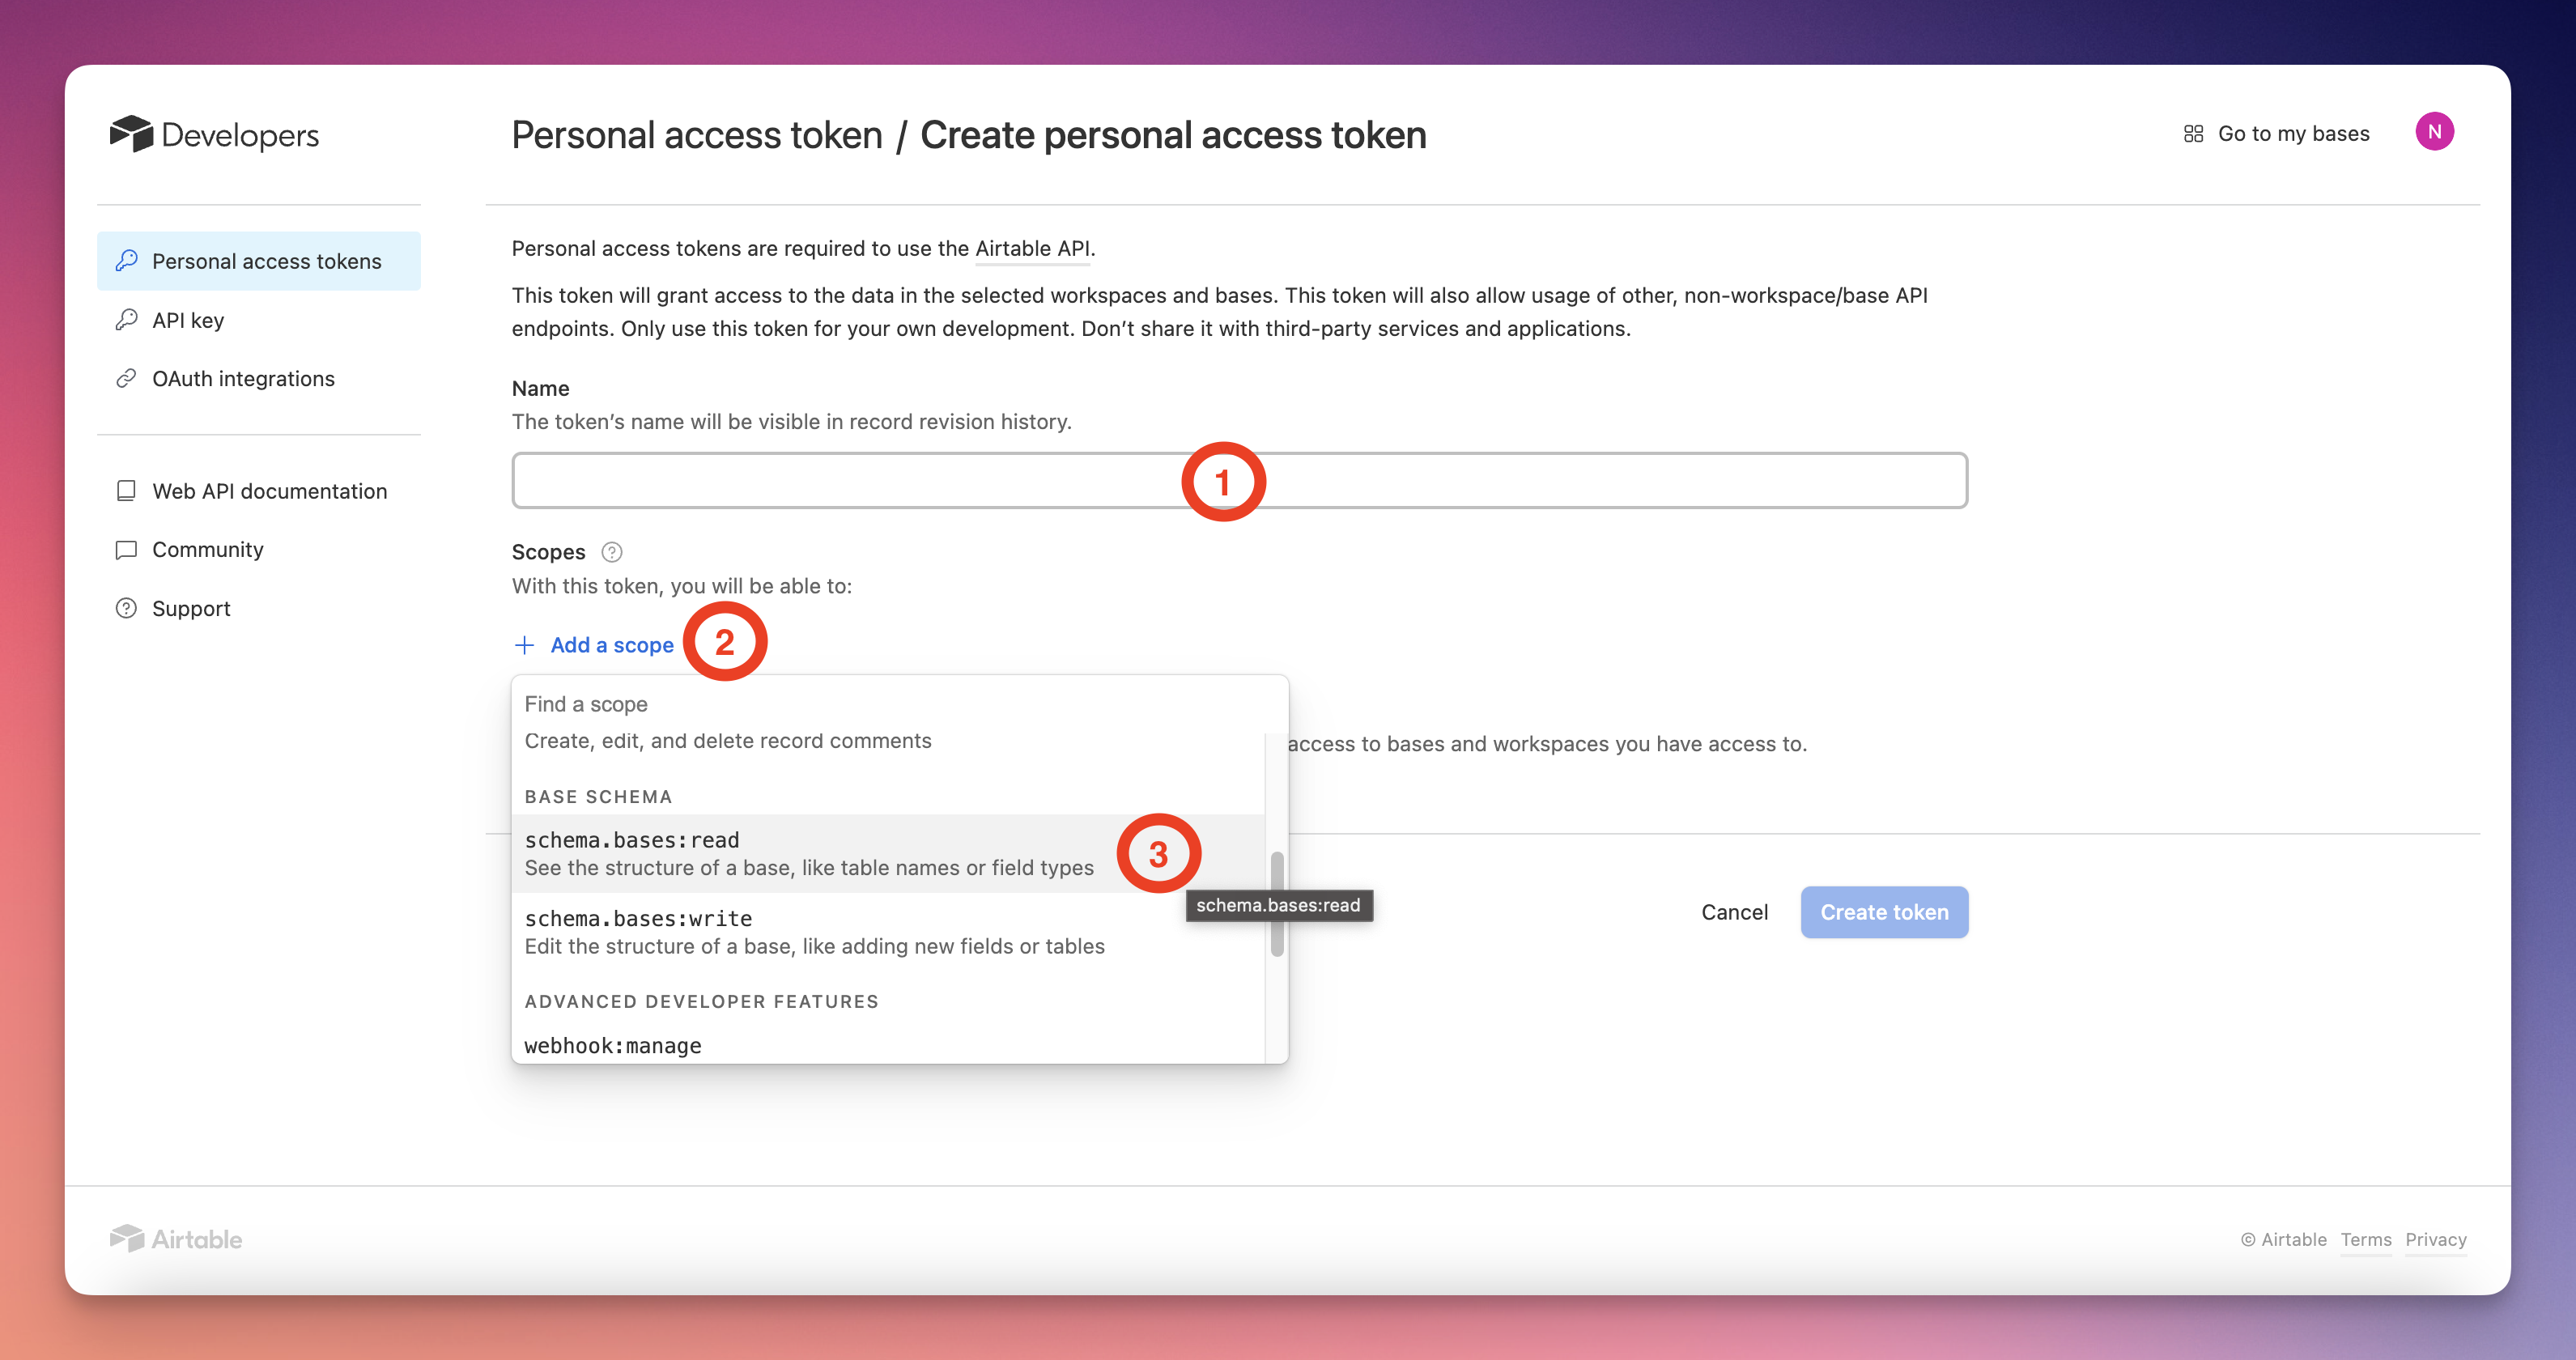
Then, you will have to:
- Give your token a name (1)
- Click on "Add a scope" (2)
- Select
schema.bases:read(3)
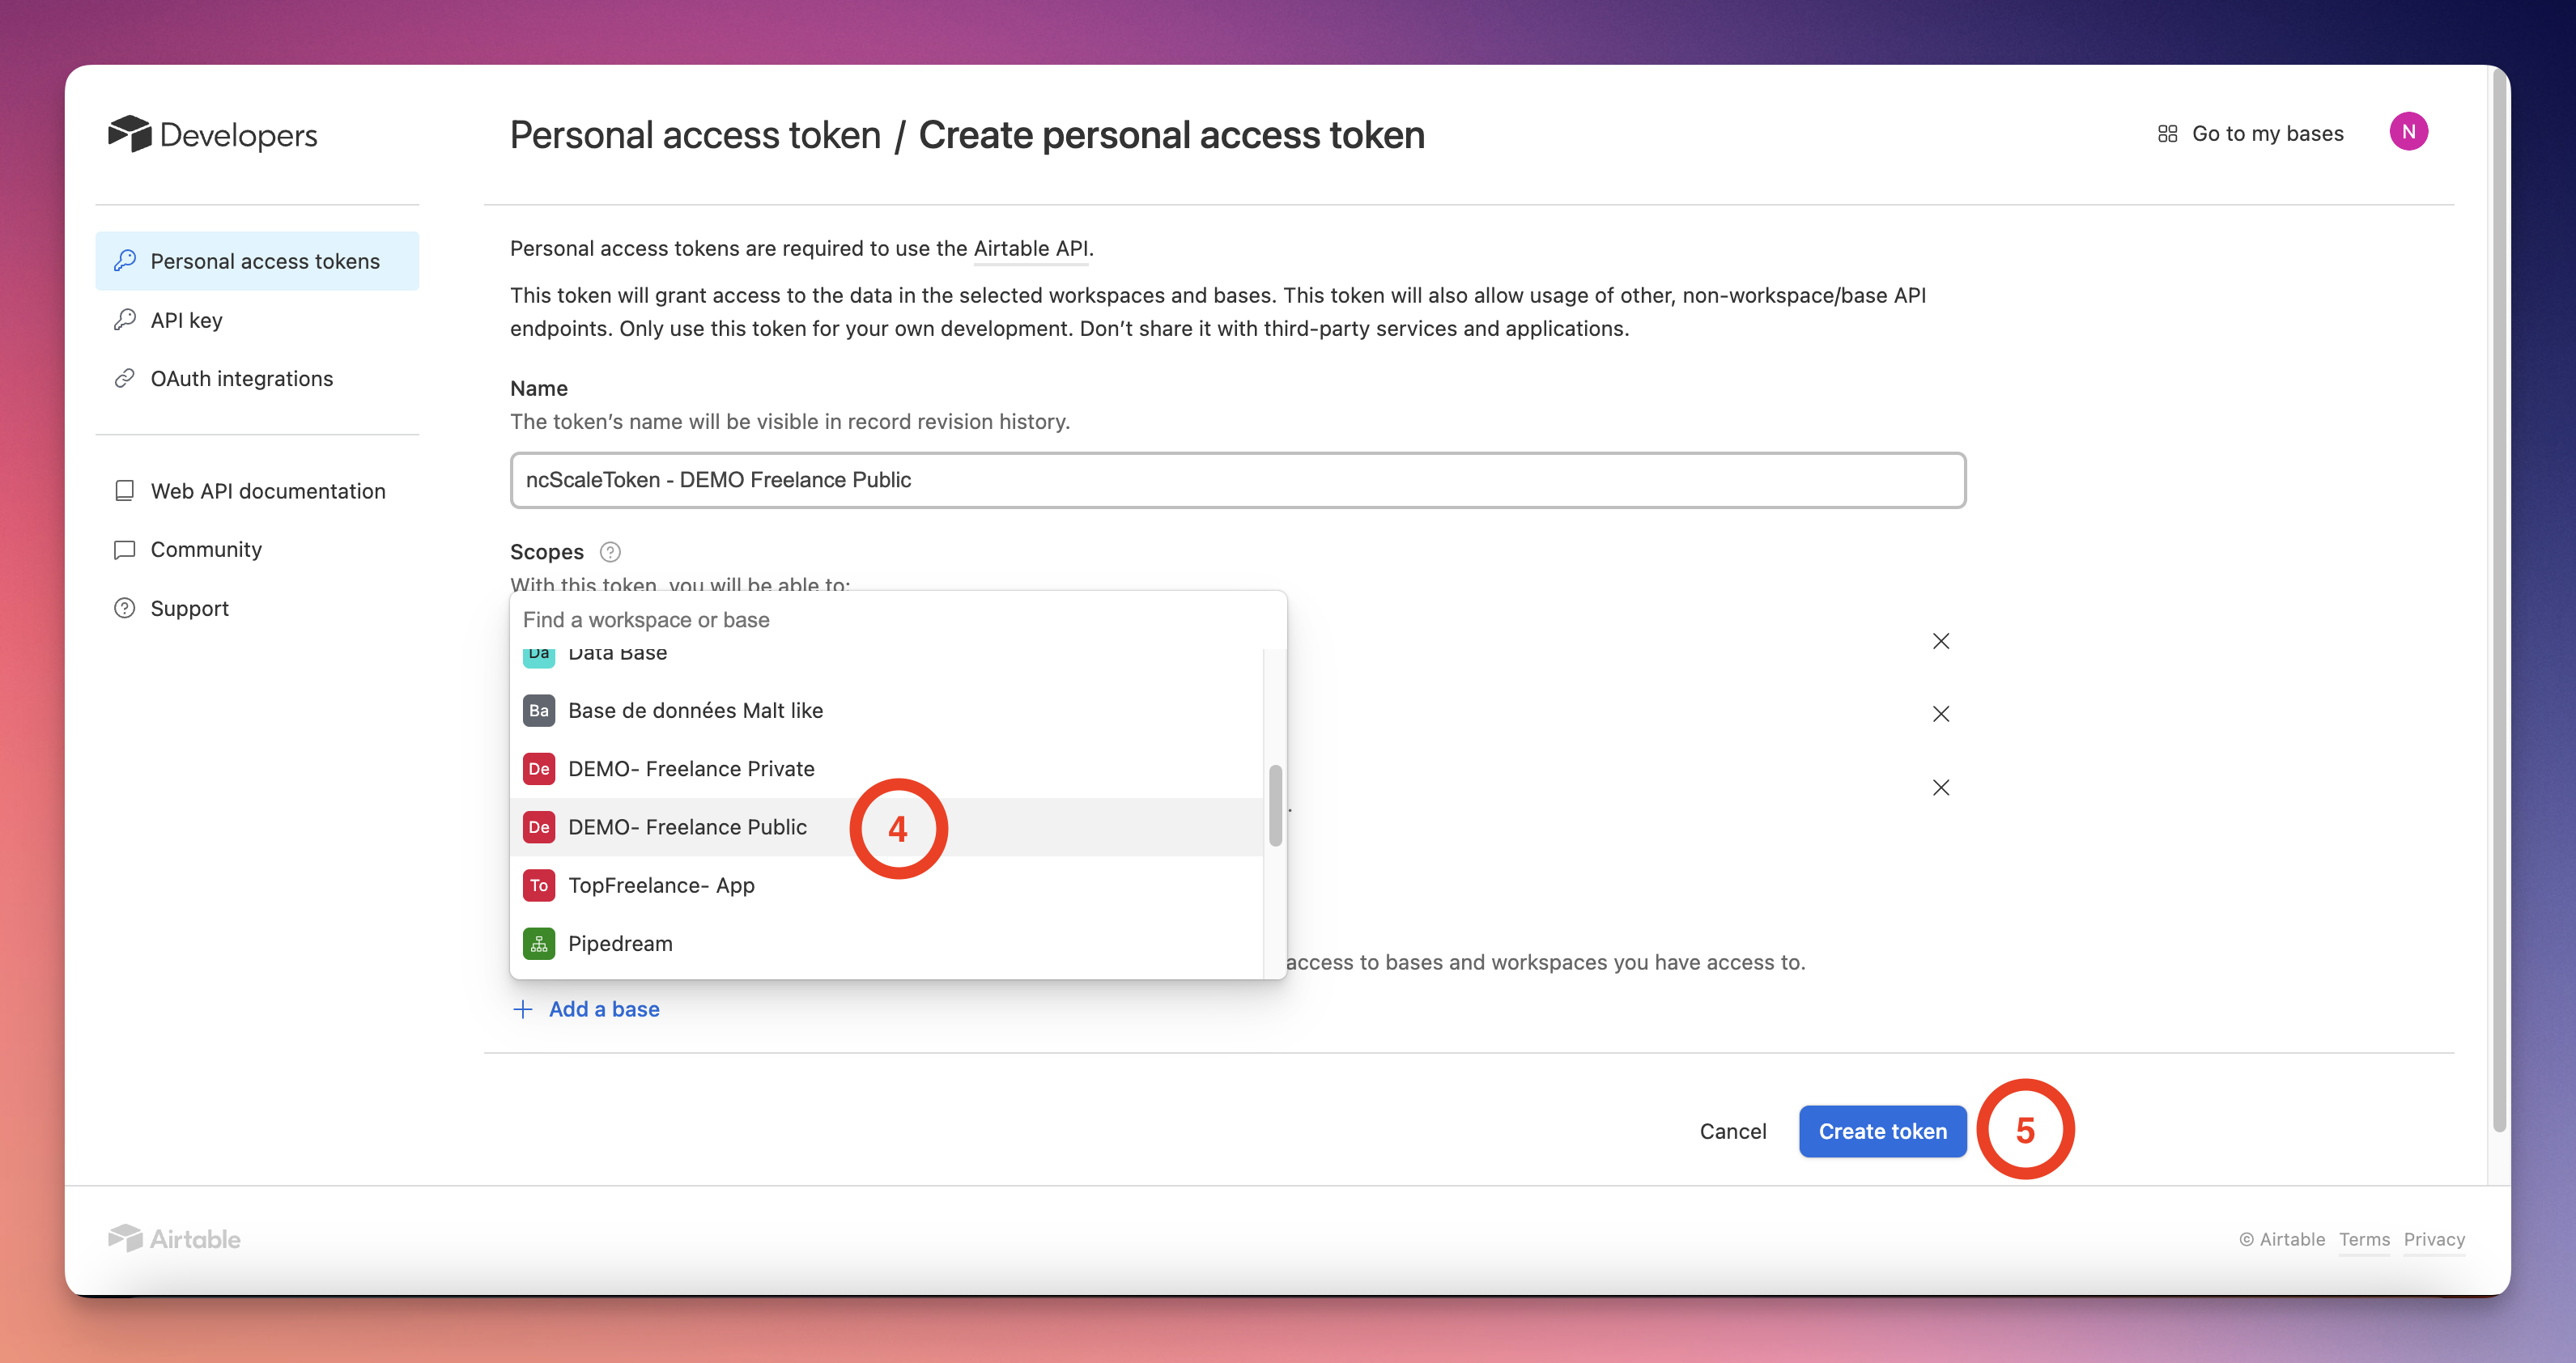
- Click on "Add a base" (4)
- Select your Airtable project (5)
- Click on the "Create token" button (6)
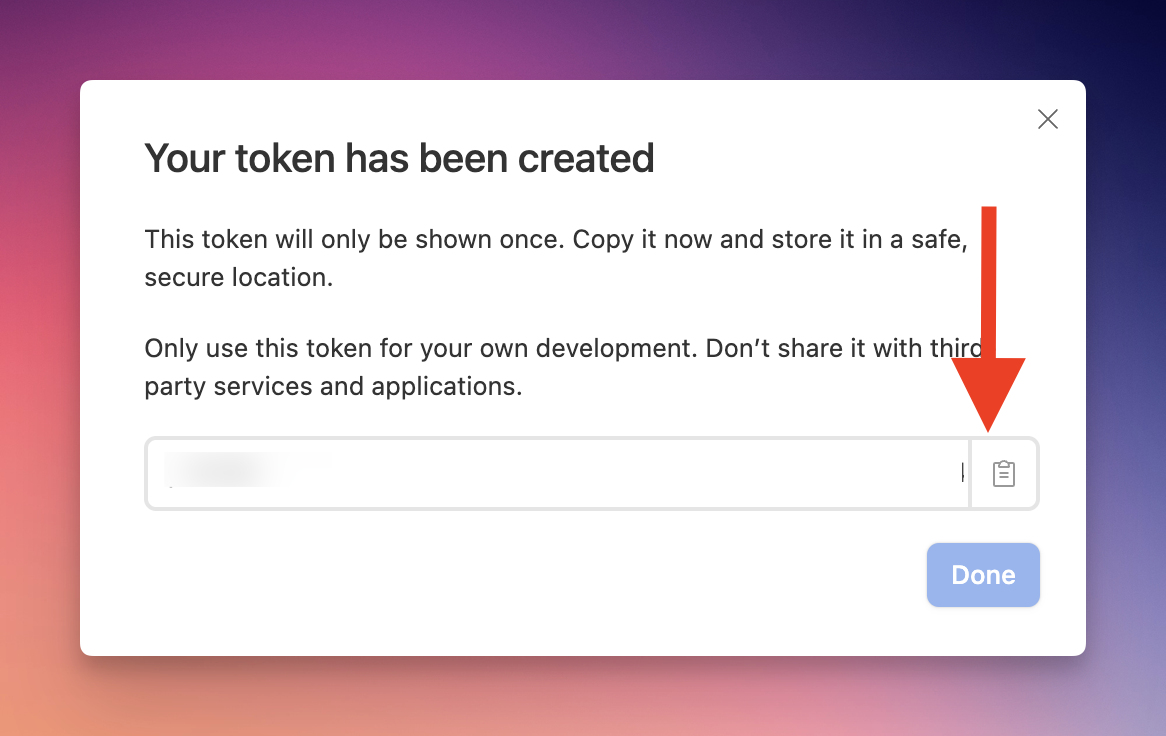
And now you will see a little modal, with your new APIKey. Copy it, click on the "done" button, and now you've completed the part on the Airtable side!
Then, on the ncScale side, you'll have to create your tool. To do that, press "CMD + K" (or CTRL + K on Windows) and click on "Add new tool".
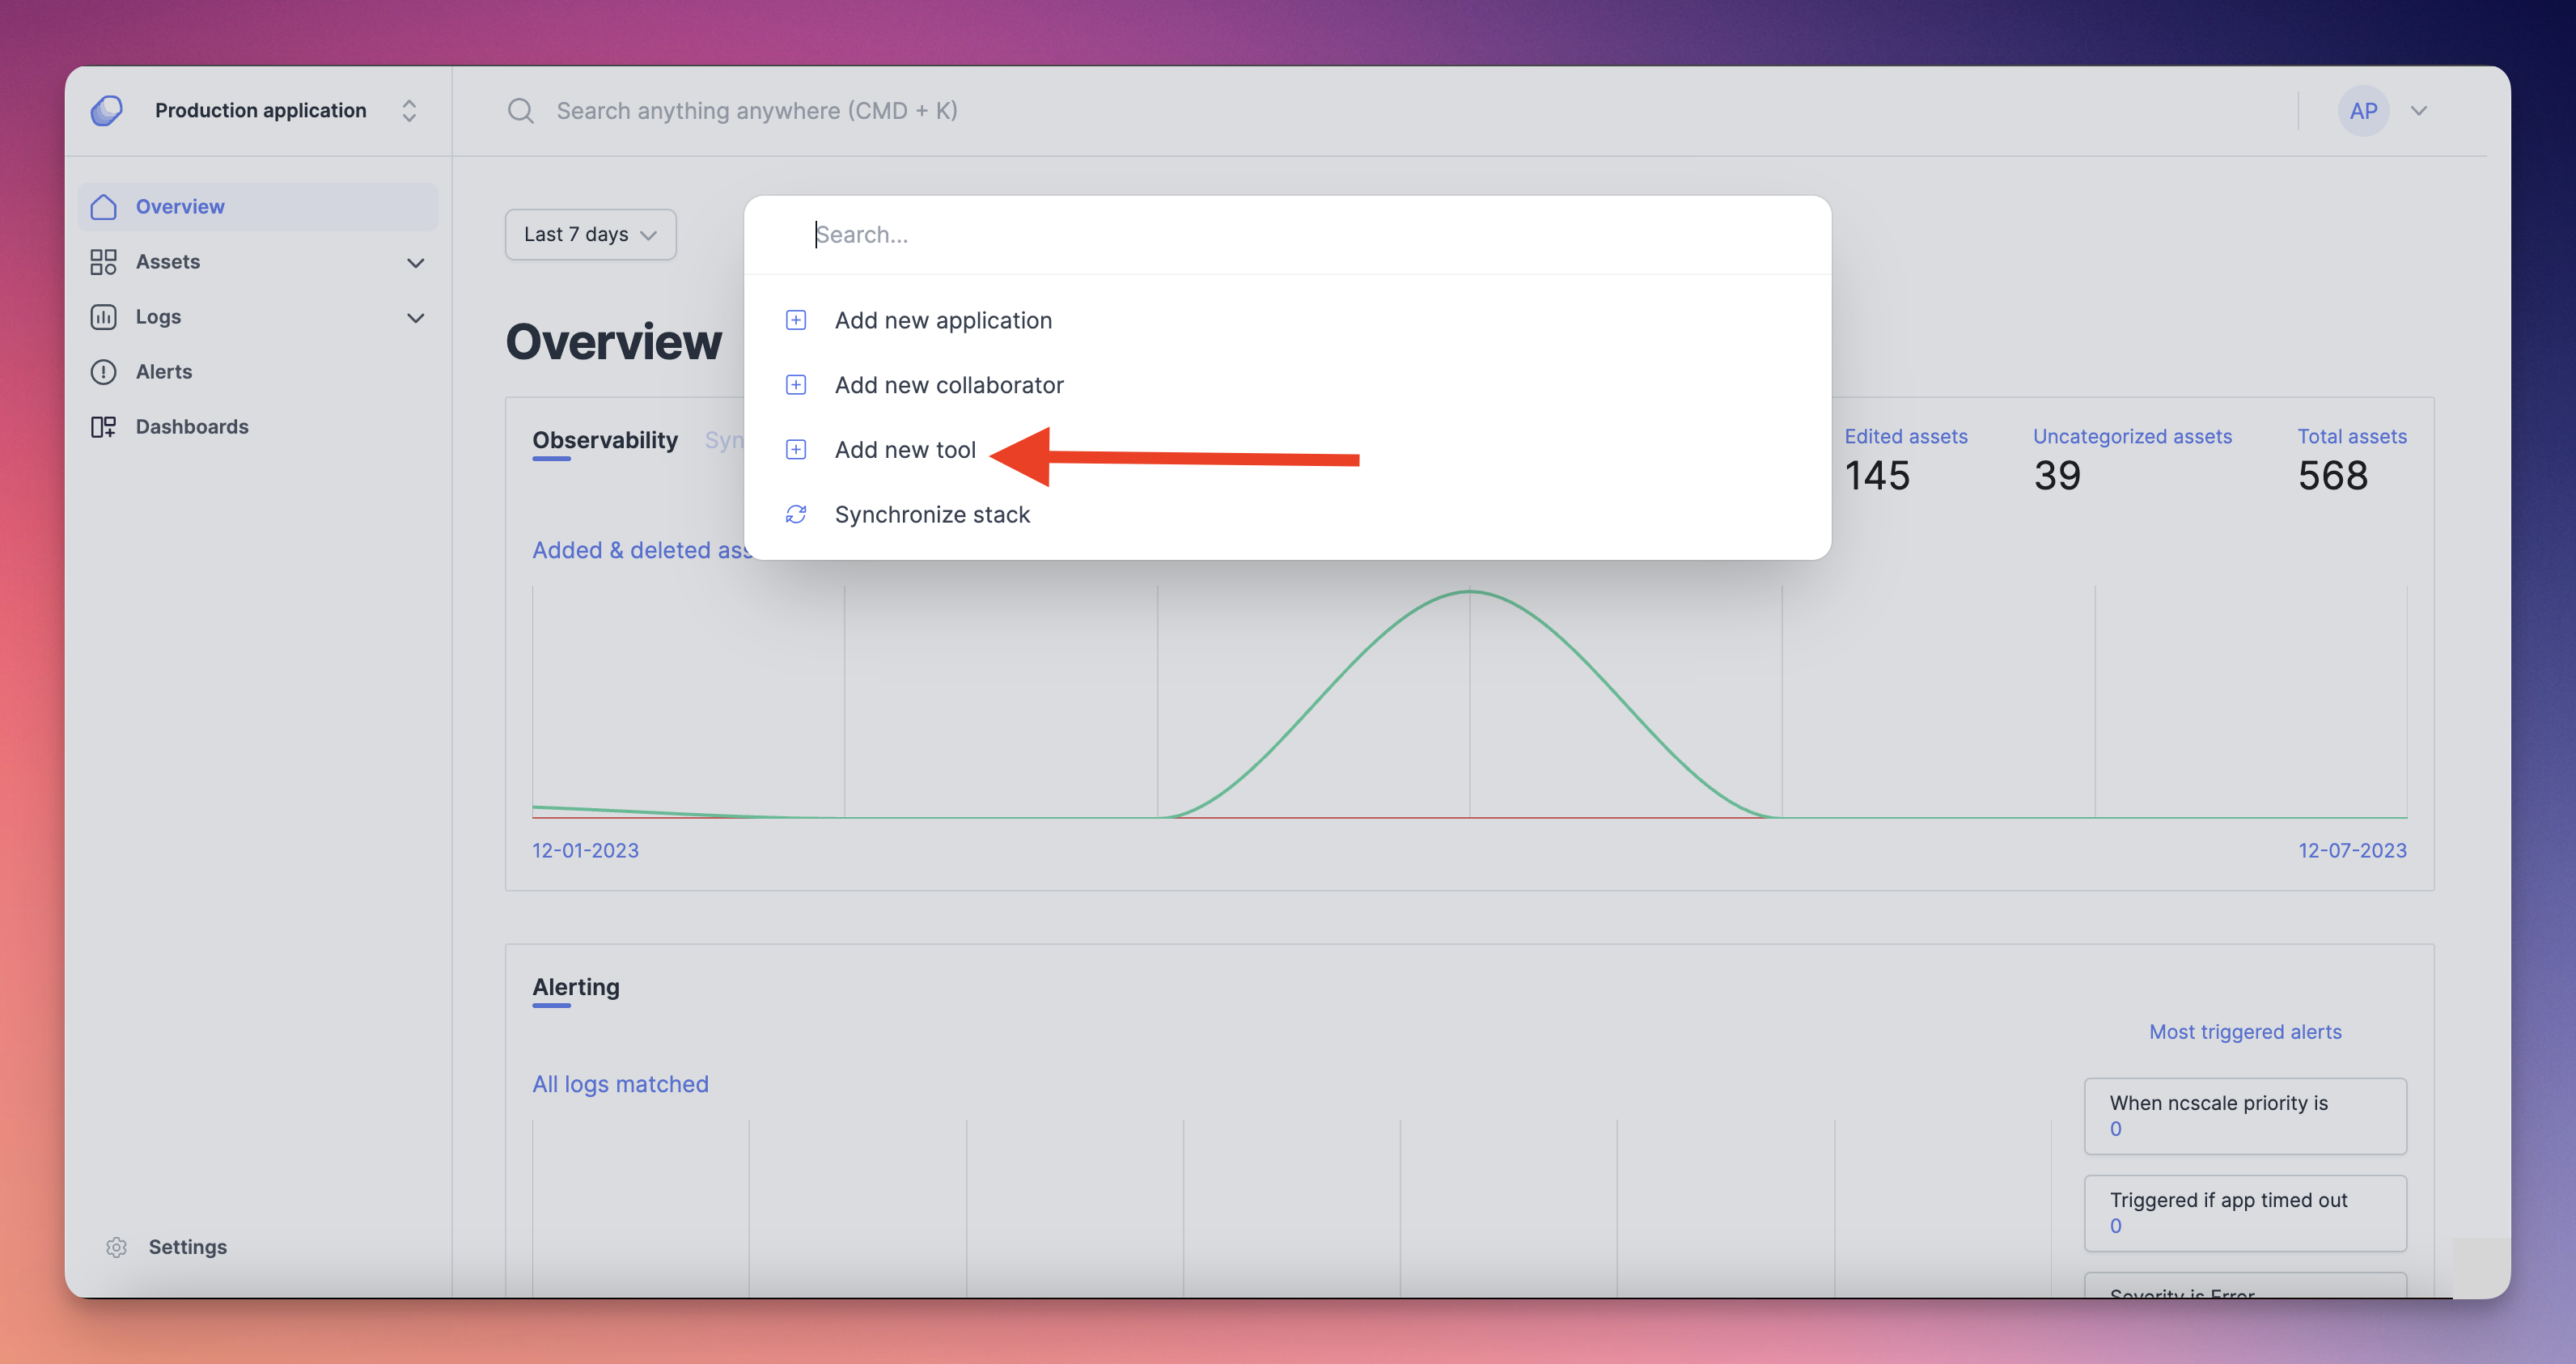
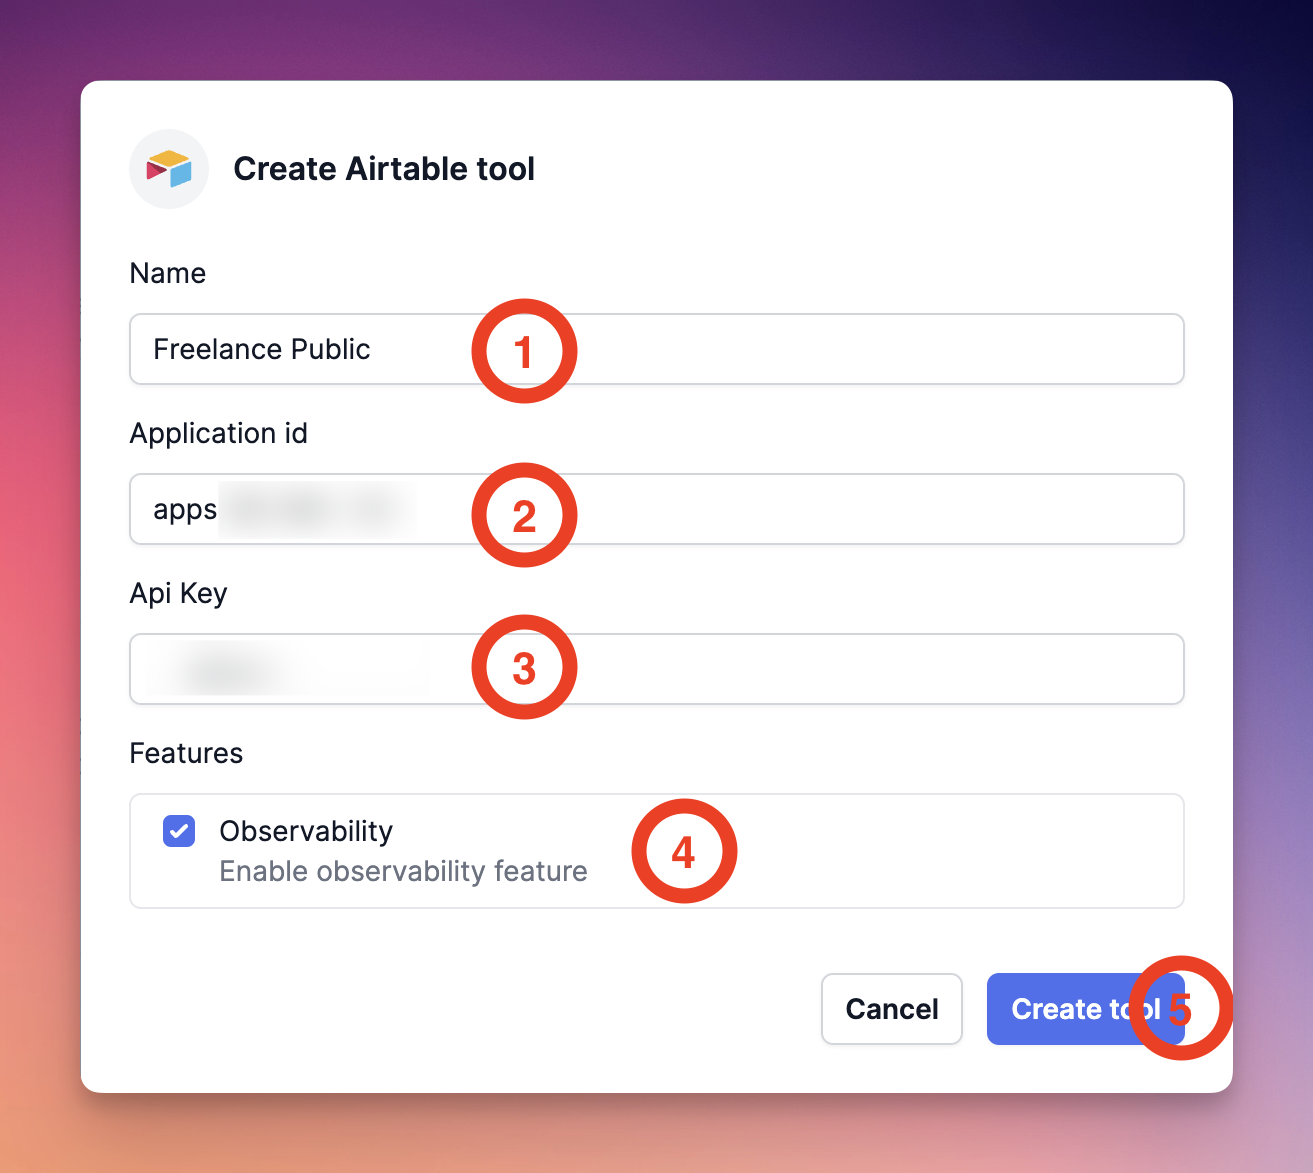
Then, select on the list "Airtable". A little modal will appear on your screen. Fill the form with :
- The name you want to give to your Airtable tool (1)
- Your Airtable project ID (2)
- Your Airtable APIKey (3)
And then you can choose whether or not to activate the features available for Airtable (4). Finally, you can click on the "Create tool" button (5) to complete your Airtable tool creation.
And now, your Airtable tool is completely connected and ready to go!